Help center
Everything you need to go live everywhere with VPULS3, in minutes.
Get started in 3 steps
- Create your account on vpuls3.tv (or sign in with VPZONE).
- Pick your source: your encoder (OBS, Streamlabs…) or your Twitch channel.
- Add and enable your destinations (VPZONE, YouTube, Kick…), then go live. VPULS3 relays everything automatically.
Tip : Playing on Xbox or PlayStation? Jump to the “Xbox and PlayStation” section: it's even simpler.
The dashboard
The dashboard gathers everything you need during a live. Here are its five areas:
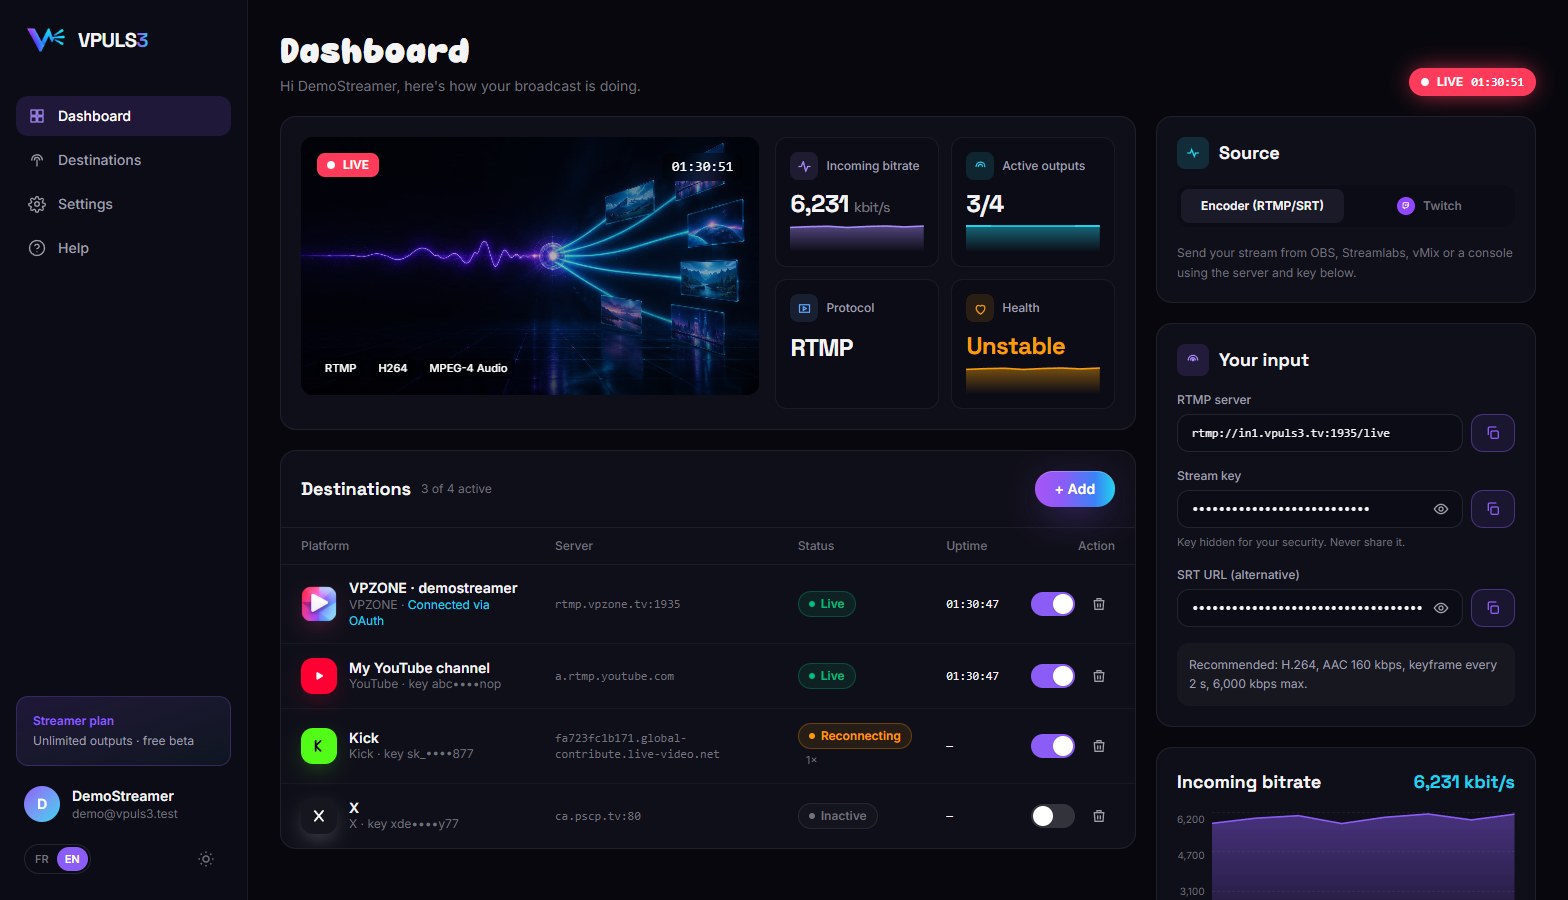
- 1 · Live preview
- Your live video, in real time (muted by default, with a button to unmute). The LIVE badge, uptime and received tracks (RTMP, H264, audio) are overlaid.
- 2 · Metrics
- Incoming bitrate (kbps), active outputs, protocol in use (RTMP, SRT or TWITCH) and signal health (Excellent or Unstable).
- 3 · Destinations
- Your platforms, their real-time state, uptime and a switch to enable or cut each one.
- 4 · Source
- Where your stream comes from: your encoder (RTMP/SRT) or your Twitch channel.
- 5 · Your input
- The server, stream key and SRT URL to paste into your software. Below it, the incoming bitrate chart.
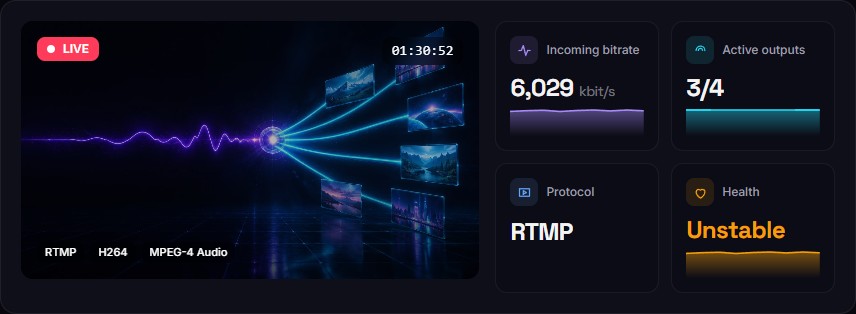
Tip : Health turns “Unstable” as soon as an output reconnects: check the destination list to see which one.
Choosing your source
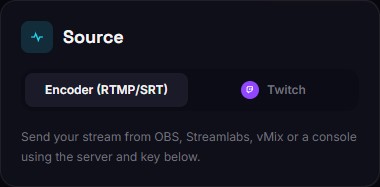
- Encoder (RTMP/SRT)
- Always available. Send your stream from OBS, Streamlabs, vMix or any encoder to the VPULS3 server. Lowest latency.
- Twitch
- Stream to Twitch as usual; VPULS3 detects your live and relays it to your other destinations. Click the Twitch tab then “Link my Twitch account” the first time.
- With the Twitch source, keep “Auto-start” on: your outputs start by themselves 30–60 seconds after your live begins.
- Twitch destinations are skipped while Twitch is your source (to avoid a loop).
Setting up OBS (or another encoder)
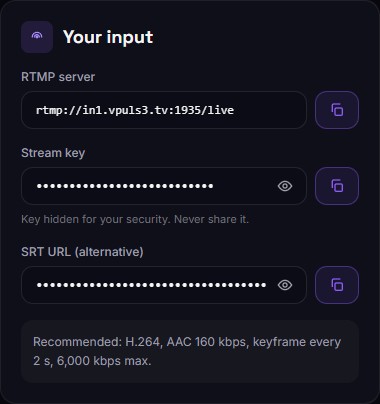
- In OBS: Settings → Stream → Service: “Custom”.
- Server: paste the “RTMP server” shown on the dashboard (rtmp://in1.vpuls3.tv:1935/live).
- Stream key: paste your VPULS3 key (copy button). Never share it.
- Click “Start Streaming”. The dashboard switches to LIVE within seconds.
- Video
- H.264, keyframe every 2 s
- Bitrate
- 6,000 kbps max to stay compatible with every platform
- Audio
- AAC, 160 kbps
- Unstable connection (4G/5G)
- Use the SRT URL instead of RTMP: same key, better loss resilience
Adding destinations
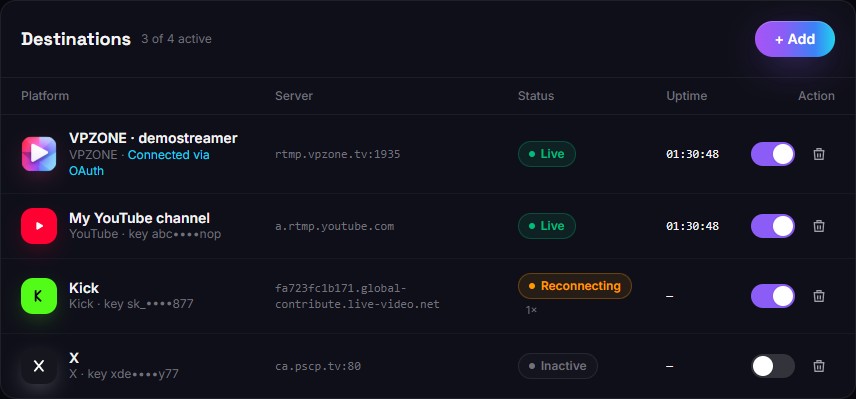
- Click “+ Add” and pick the platform.
- VPZONE, YouTube or Kick: click “Connect my … account”; the destination is created automatically, no key to copy.
- Other platforms: paste the server URL (prefilled when possible) and your platform stream key.
- Turn the switch on. Only enabled destinations receive your live.
- Live
- The platform is receiving your stream.
- Connecting…
- The output is starting (a few seconds).
- Reconnecting
- The platform dropped: VPULS3 restarts that output automatically without touching the others.
- Error
- Too many failures: check the key or URL (hover the status for details).
- Ready
- Enabled, waiting for your live.
- Inactive
- Switched off: this platform won't receive the live.
Tip : You can add the same platform several times (for example two YouTube channels).
Xbox and PlayStation
On console there's nothing complicated: stream straight to Twitch and VPULS3 handles the rest.
- On your console, link your Twitch account and start broadcasting to Twitch (Xbox: Guide → Capture & share → Live streaming. PlayStation: Create button → Broadcast → Twitch).
- In VPULS3, Source card: choose “Twitch” and link your Twitch account (once). Keep “Auto-start” on.
- Enable the destinations you want (VPZONE, YouTube, Kick…). That's it: every time you go live on Twitch, they start automatically.
Console mode: on a console you only see Twitch chat. Turn on “Console mode” in the Source card (Twitch tab): messages from your other platforms are posted into your Twitch chat, prefixed with their origin, for example “[VPZONE] name: message”.
- Compatible platforms
- VPZONE, YouTube and Kick, as long as the destination was linked with “Connect my … account” (OAuth). That's how we identify your exact channel; a destination added with just a key isn't synced.
- Twitch permission
- The first time, click “Allow chat sync”: VPULS3 asks Twitch for permission to write in your chat (and only that).
- On the dashboard
- With Console mode on, each destination shows a “Chat” badge when its chat is synced.
- Delay
- A few seconds. Your own messages on VPZONE aren't echoed.
Tip : Expect a 30–60 second delay between Twitch and the other platforms: that's normal, the stream goes through Twitch first.
FAQ and troubleshooting
- OBS can't connect
- Check the server and key (copy them with the buttons). If you regenerated your key, update it in OBS.
- An output stays on “Reconnecting”
- The key or URL for that platform is probably wrong, or the platform rejects the bitrate (Kick caps bitrate per account). Lower the bitrate or check the key.
- YouTube receives nothing
- Open the YouTube Live Control Room (studio.youtube.com) before going live. If connecting YouTube says live streaming isn't enabled, enable it in YouTube Studio (up to 24 h).
- X: stream received but not published
- X requires publishing the broadcast in Media Studio (Producer) on its side.
- Twitch source: nothing starts
- Make sure “Auto-start” is on and at least one destination is enabled. Starting takes 30–60 s.
- “Sign-ups are temporarily closed”
- Our servers are at full capacity; try again a bit later, new servers are added regularly.
Can't find your answer? Email us at support@vpuls3.tv